Your Ultimate Choice for Computer, Internet, Blogging, SEO & PC Troubleshooting Tips!
Showing posts with label Hardware. Show all posts
Showing posts with label Hardware. Show all posts
Monday, 4 August 2014
Why Pen Drive/ Hard Disk Space Shows less than Stated Capacity
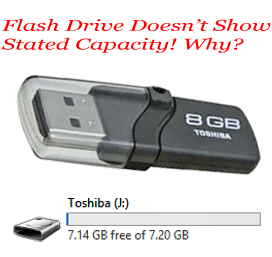
You may often get confused about the storage capacity of your hard disk or flash drives. A 160 GB Hard Disk shows only 148 GB. A 30 GB hard disk partition shows only 29.2 GB usable space. A 8 GB pen drive shows at most 7.56 GB storage capacity. But why the stated capacity of the drive can't be usable? Read the full post. This is our today's discussion. Few days ago my 8 GB Apacer Brand Flash Drive gets damaged. Its capacity was 7.44 GB. I went to the vendor and submitted this to get a replacement (if possible). And also purchased a new one (Same Brand). But this time I'm really disappointed. Though its stated capacity is 8 GB, it shows only 7.2 GB usable space. 800 MB less capacity.
As the price gets half the quality follows the it. Two years ago I purchased that pen drive costing $12. But 5 days ago it takes less than $7. Well I'm afraid. I'm anxious about the service life of the new pen drive.
Let's back to the discussion. Our discussion is about the actual usable capacity vs. listed capacity. And why actual space is always less than stated capacity.
There are 3 different reasons behind it:
- Different operating systems treat your disk differently. Windows OS may not show the disk space like Linux, Mac or Unix. There are little discrepancies between the file formats and algorithms used by different operating systems. (It doesn't matter much)
- Another reason is that- A portion of memory space is reserved for system filesand data sector for better performance. This is the primary reason behind the less usable space than the mentioned space.
- The last reason but not the least is the calculation method used by the disk manufacturing companies. They consider 1 KB = 1000 Bytes. But your OS may consider it as 1 KB = 1024 KB. Here you are also losing a considerable amount of disk space.
Look at the calculation below: Virtual Storage Disk Storage1 MB = 1024 KB 1 MB = 1000 KB1 GB = 1024 MB 1 GB = 1000 MB8 GB = 8192 MB 8 GB = 8000 MB7.2 GB = 7372 MB 7.2 GB = 7200 MBSee details here . . .
So, you are getting 172 MB less space because of using 1 KB = 1000 Bytes!
Now what do you think? Shouldn't the manufacturer mention the actual usable memory on the packet? :)
32-bit Vs. 64-bit Windows: Remove your Confusion

Windows has two types of operating systems running currently. Many of you are already know about them. One is 32-bit and another is 64-bit. In this post I would like to discuss about them. After reading this post you will know about the following issues:
- What type of operating system you're currently running (32 or 64 bit)
- What is the difference between 32-bit and 64-bit windows
- What is the advantages/ disadvantages of 64-bit OS
- Problems regarding application software, hardware drivers caused by the OS type
Is your Windows 32 bit or 64 bit?
If you know your system type then it's okay. But if you don't then follow any of the system below:
- Right click on My Computer/ Computer Icon > Choose Properties > Then Look at the System Type > It could be either 32 bit (x86) or 64 (x64) bit.
- Or, Press Start + Pause to open Properties Window. Then check it.
- Or, Press Start + R > Type dxdiag > Look at the Operating System > System Name with bits will be available there.
Difference between 32-bit and 64-bit Windows:
One of the basic differences between the 32-bit and the 64-bit version of Windows relate to the handle of primary memory or RAM. A 64-bit version of Windows operates RAM in a different way than a 32-bit Windows does.
- 32-bit Windows can't handle more than 4 GB RAM. But a 64-bit Windows can manage up to 128 GB RAM!
- A 64-bit version of Windows can process a larger volume of data compared to 32-bit version of Windows.
- A 64-bit version is more secured than 32-bit version of Windows.
Advantages of 64-bit Version of Windows:
- More Processing Power
- Greater Performance and Accuracy
- Improved Security
- Ability to Address More RAM (Up to 128 GB)
- Ability to handle heavier programs (Video Editors, Graphics Design Applications, High Resolution Games etc.)
- Most importantly, 64-bit version of Windows is great for multitasking!
Disadvantages of 64-bit Version of Windows:
- Compatibility Issues of Hardware Drivers
- Consumes High Volume of Hard Disk Space and Memory
- Compatibility Issues of Application Software
Factors to be Considered While Choosing System Type . . .
- Do you work with heavier programs like Illustrator CS6, Video Editor or High Resolution Games?
- Is your processor 64-bit? (Press Start + Pause to check)
- Do you have the 64-bit version device drivers for all of your devices?
- Are all of your necessary application software have 64-bit version or they compatible with 64-bit OS?
- Do you have more than 4 GB RAM installed on your PC?
If the answers are yes to all the above questions, then you can easily install a 64-bit version of Windows on your PC. If you're confused then have a try. If you feel problem, then get back to the 32-bit version. (Even I don't use 64-bit OS yet due to the compatibility problems).
Still Confused? Remove your Confusion . . .
- A 32-bit OS will work fine with 64-bit processor.
- A 32-bit application will be compatible with 64-bit OS.
- But a program specifically compatible with 64-bit system will not run on 32-bit OS.
- A 16-bit application will not run on 64-bit OS.
- A device driver designed for 32-bit OS will not work with 64-bit OS and vice versa.
Hopefully, after reading this post, you have a good idea about the 32-bit and 64-bit Windows. If you're still confused you can comment below. But my suggestion is- have a try both the system. Definitely you will gain practical experience.
Best of Luck. :)
Clean Up your PC to Avoid Overheating Problem
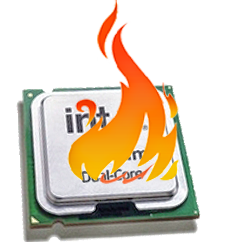
It's just about two days ago. I had been working on my PC for one and half hour. Suddenly the system got shut down without showing any error message! Immediately after 10 or 15 seconds I tried to power on the system. Power signal appeared but lasted for only 3 seconds. Then I pushed the switch again but same thing happened. I decided to wait for few minutes. At the third attempt I was able to turn on the system.
After turning on the system, I ran an application named Speccy, a program that shows detailed information about computer, to check the system temperature. Oh my Goodness, I was really surprised seeing the result. My room is not air conditioned and its temperature may be under 30 degree Celsius. But the system temperature was as below:
Processor : 820 to 850Motherboard : 750 to 800Hard Disk : 500 and Above
So, what happened actually? What's the reason. Was it caused by the room temperature? No, not at all. Because only 300 temperature is nothing for a PC. Actually the problem was dust. Yes, I haven't open the PC case for more than a year. And I didn't clean it up for a long time. CPU Fan, Motherboard and all other parts of the system unit was under dust!
So I opened the case and cleaned it up properly. After cleaning up the system the temperature was as below:
Processor : 550 to 600Motherboard : 550 to 580Hard Disk : 450 to 500
This looks quite normal. Isn't it?
It's been more than a year when I wrote a post about Computer Maintenance: Extend Your PC Life. Of course it applies only for Desktop PC.
Many beginner level PC users report that- My PC gets restarted after running for a few hours. One of the prime reasons for this problem is Overheating. Sometimes it might be caused by virus. In other cases if your Windows is not genuine, then it may be restarted automatically by Windows itself.
Now, I would like to discuss how to clean up the system unit of a desktop PC. Open the PC case. Observe the internal condition of the system- Amount of Dust. If you have a machine to clean dust use it carefully. Otherwise clean it using a soft cloth or any other cleaning materials. Make sure the piece of cloth is not wet.
Gently clean the Motherboard, RAM, CPU Fan, Hard Disk Surface etc. Remove the CPU fan if possible. Then clean it properly with a brush. Unplug and plug the internal connectors with care. You should clean your PC in that way 2 times a year.
Precautions:
While cleaning the system, keep in find the following issues:
- Never rub the surface of the Motherboard with pressure. Because it consists of numerous connections that look like zigzag lines.
- Make sure the tissue or cloth you're using is not wet.
- The cloth should be as soft as possible.
- Unplug and plug the internal connectors properly. Never blend any pin.
- While rubbing by the side of a capacitor, make sure you're not pressuring it. If any of the capacitors breaks down then you get a lot works to do . . . !
Whatever you do, do it with care. If you are not capable enough, then take help from expert.
Get System Information by Simple CMD Command: Systeminfo !!
There are many ways to view your system information. But each of these ways has some advantages and disadvantages. You can't get information about all issues from a system. As a result you should know different ways to view your PC information. In this site two posts have already been published about viewing system information.
- DirectX Diagnostic Tool: Press Start + R > Type dxdiag > Press Enter > Get Details of your system.
- Speccy: A third party tool to view system information. It shows both hardware and software information. Also great for measuring the system temperature.
Another popular way to get the system information is System Properties. You can get this by clicking right to the My Computer Icon and then choose Properties. Keyboard shortcut to view System Properties is Start + Pause. But it shows only minimum information. Just Processor, RAM and System type (32 or 64 bit).
If you would like to get details about your system you must use either Dxdiag or Speccy. But today I'm gonna share something else with you! Yes, you can do it by a simple command. Let's start-
- Press Start + R to open Run.
- Type cmd to run Command Prompt.
- Type systeminfo hit enter and wait for 2/3 seconds
- Now you get the details!
Systeminfo will show the following information:
- OS Name, Version, Manufacturer, Configuration and Build Type
- Name of the Registered Owner and Organization
- Product ID
- Windows Installation Date
- System Boot Time
- System Manufacturer, System Model and System Type
- Processor and its Capacity
- BIOS Name with Version
- Windows Installation Directory
- System Language and Keyboard Input Method
- Time Zone (Selected GMT Time Zone)
- Total Physical Memory/ RAM
- Virtual Memory: Maximum, Available, In Use
- Others: Page File Location, Domain, Logon Server, Hotfix, Network Card etc.
Have a look at the image below to get a clear idea
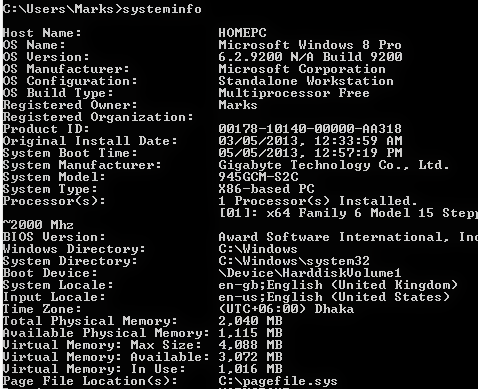
Actually, a single way to do something is not enough for a person. Every system has some exclusive advantages. So you need to know all possible ways to do any task. That's why I've presented this command to you even after there are 3 other ways to view system information.
Touchscreens Used with Smartphones
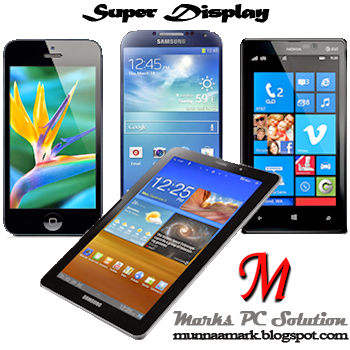
Basically this is a knowledge based article. It can just enrich your knowledge about display technology. And I think you will enjoy this. I'll try to provide you a brief idea about the screen technology used by the leading cell phone manufacturers.
By this time you should know there are different types of display technologies such as LCD, LED, TFT, Retina etc. But how many of you know the details of each type? To be honest, I didn't have much idea about these before reading an article in a newspaper. Then I decided to write about smartphone screens on Marks PC Solution. I've also gathered information on display technology from different sites.
TFT LCD Display (Thin Film Transistor Liquid Crystal Display)
This is the most widely used display technology at present. TFT LCD technology ensures the clear view. It is better than old LCD technology to view High Quality pictures and video.
This type of display is relatively cheaper. So it can be used in low-priced phones too.
But this technology has some limitations too. You can't operate your phone in sunlight. Your display will be almost unseen when you're in daylight. And this type of display consumes too much battery. You should keep the display off as much time as possible.
IPS LCD Display (In-Plane Switching LCD)
IPS LCD is better than TFT LCD Display Technology. No matter how you wanna see it. You can get a clear view from any angle. It doesn't consume much power. That's why it saves your battery power.
Manufacturing cost is little bit higher and used with medium-priced cell phones.
Resistive Touchscreen Display (Don't Call it RTS!)
I've searched Google by RTS. Actually it has no short form. You should call it Resistive Touchscreen Display.
In this technology, there are two layers in the screen. And there is a minor gap between the two layers. Whenever the first layer get your touch, the blank space between two layers blends and pressure the second layer. Immediately the processor gets signal. Thus Resistive Display Technology works.
You can operate the phone using fingers or stylus. But using a stylus will be more comfortable.
Capacitive Touchscreen Display
If you wanna operate your phone with fingers then capacitive display is more comfortable than resistive display. As made for operating with fingers, you can't use stylus or something else to work with capacitive display.
This display ensures fast response time. Manufacturing cost is also high. This display is used with high-priced smartphones.
OLED Display (Organic Light Emitting Diode)
Most of you maybe familiar with only LED - Light Emitting Diode. More than a year ago, I wrote a post about the difference between LCD and LED. OLED is the improved version of LED technology.
OLED is a high quality display technology for cell phones and monitors. It gives you a bright look. This type of display is very light and viewing angle is excellent. It supports 16 million colors and reponse time is very short.
OLED display consumes less power and thus it saves your battery.
AMOLED Display (Active Matrix LED)
Active Matrix OLED is a display technology that is used with mobile devices and televisions. It is actually an improved version of OLED.
One of the great features of this display is the viewing capacity in sunlight. Users can see the screen in daylight without any problem. AMOLED ensures vivid picture with super sensitive screen.
As the manufacturing cost is relatively higher, this type of display is used with high end mobile devices.
Super AMOLED Display
Next to the AMOLED is Super AMOLED. It is nothing but the improved version of AMOLED developed by Samsung. This technology is used with the galaxy series devices.
Super AMOLED includes the following features:
- Light and thin
- Vivid Display
- Faster Reponsive Capacity
- Less Power Consuming
Retina Display
The most modern version of smartphone screen is the Retina Display, which is a combination of IPS LCD and Backlit LED technology. As developed by Apple, this type of display is only used with iPhone.
It is a so high resolution display that you can't see the pixels with blank eyes. That's why it is named as Retina Display.
Retina Display is very sharp, vivid and clear.
Heptic Touchscreen Dispay
Nokia and BlackBerry are using this type of display technology. This display is capable of identifying the touch accurately. Thus it enables users to work with touchscreen comfortably.
This display is reliable, comfortable and great for typing. And it's very popular among the users.
Gorilla Glass Display
Maybe you can guess something about this display. Yes you're right. This display is made for rough and tough use.
Gorilla Glass is very hard and durable display. It keeps your display out of scratch. Even it can protect the screen from hammer. Many cell phone manufacturers are now using Gorilla Glass in their devices.
Here I've just discussed about 10 types of displays. And these have many variations. If you'd like to know more then search Wikipedia.
Create New Volumes without Partition !!

Disk Management is a nice tool to manage your hard disk drives. With this tool, you can easily format, shrink and extend your existing volems. You can do some other tasks too. But today I'm gonna discuss about creating new volumes by splitting existing volumes.
Background Story
Two weeks ago, one of my acquaintances got a new laptop. It comes with Windows 8, Intel Core i5 processor and 1 TB Hard disk. Not very extraordinary nowadays. But I was really surprised when heard there is only 1 partition in his laptop!! Can you believe it? One partition for a 1 TB hard disk! My goodness - this is a thousand GB partition!
I know how to split a drive to create new partition. But didn't even try this earlier. After getting the case of 1000 GB partition, I tried to shrink a drive in my own PC. After successfully trying this on my PC, I advised him how to divide the one partition into several drives. By this time maybe he has fixed this. :)
Supported Versions:
Disk Management tool is same both in Windows 7 and 8. Windows XP may have the same advantage but I'm not sure. If XP users has any problem, you can inform be through comments.
Create New Volumes Without Partition - No Restart! No Interruption!!
Make sure you're the Admin of your PC. And right now you're logged in as Administrator. Now start -
- Right click on My Computer icon from desktop. (How to show My Computer icon on desktop)
- Hit on the Manage option.
- Computer Management window will appear.
- Choose Disk Management under the Storage option from the left pane.
- Here you will get the list of your volumes with capacity and free spaces.
- Right click on the drive you wanna shrink.
- Select Shrink Volume and you will get the below window.

Here you will get the total size before shrink. Now enter the space to shrink. Simply count the 1000 MB for 1 GB. In the image I've used 5000 MB for 5 GB. Then check how much you will have in the drive after shrink. Before proceed, make sure everything is okay.
Now Press Shrink > You will get the following image > Right click on the Free Space > New Simple Volume > Pres Next > Enter Simple Volume Simple > Next > Assign Drive Letter (Suppose L) > Format the volume (Choose format type, label) > Next > Finish.
Within few seconds, you will get a brand new drive!

How to Get it Back?
Suppose you made a mistake. Or you were just trying to do it. But don't want to divide the volume actually. How do you get the new volume back to your old volume? Very simple!
- Right click on the new volume.
- Choose Delete Volume.
- You will get the above image again.
- Now right click on your old volume and choose Extend volume.
- Press Next > Next > Finish.
This procedure doesn't require any restart. Even you don't need to close any program running on your PC. It's fast, simple and reliable.
Precautions:
While running this operation you should be very careful. Though this tool is safe to use, but you may lose your data for any wrong command. Suppose, you may delete a volume which contains your valuable files. Or you may format an existing partition which contains important data. So, before making a click, be sure you're really doing the right job.
If you have any query, don't forget to leave a comment . . .
Understanding the Parts of a Keyboard
Most of the computer users are confused about the parts of the keyboard. Sometimes users can't distinguish among the different parts. However you can operate your PC without understanding the parts of a keyboard.
Graphical user interface lets you operate computer using mouse. Most of the commands are now performed by mouse. And the advent of touch screen could be the reason of the departure of keyboard! But real PC users can't leave it. I'm capable of typing up to 70 words per minute in normal keyboard. But in touchscreen, I simply hate typing. :(
Anyway, today I'm gonna discuss about the parts of a keyboard. I was searching information to write this post for few weeks. And I've been able to collect sufficient information. And now I am sharing with you.
Don't be confused! I'm not talking about mini keyboard. Here my concern is normal keyboard.
Look at the image below:
The parts of a keyboard are clearly outlined here. Each part has seprate color. So you will have no problem to identify the 05 basic parts of your keyboard. Indicator lights are also shown as a part.
- Typing/ Alphanumeric Keys: It consists of letters (Q to Z), numbers (1 to 0), symbols (<, >, #, @, *, &, $ etc.) and punctuations (?, :, ;, !, etc.). These keys are normally used for typing. But sometimes typing keys are used to give command if these are used with control keys.
- Control Keys: These keys are used to perform different actions. And can be used alone or in combination with the other keys. Commonly used control keys are Ctrl, Windows Logo Key, Alt, Esc etc.
- Function Keys: Function keys are located at the top. Yeah I'm talking about F1, F2, . . . . F12. These kes are used to perform specific tasks. The function of these keys vary from program to program. While booting for an Intel Main Board, pressing F1 will take you to the BIOS settings. And in most of the Windows Programs, F1 will take you to the help dialogue window. F2 will let you rename a folder.
- Navigation Keys: Sometimes these keys are called cursor movement keys too. These keys enable you to navigate through documents or webpages. These include arrow keys, Home, End, Page Up, Page Down, Delete and Insert.
- Numeric Keypad: This part is great while entering numbers somehwere. These keys enable you to type digits quickly. These include 0 to 9 with +, -, Enter, Numlock etc. Mini Keyboards don't have this pad.
- Indicator Lights: There are three indicators. One is for Num Lock, another is for Caps Lock and the other is for Scroll Lock.
Print Screen Button Tips!
Earlier Print Screen button was used to print the current screen directly. But now, if you hit on the Print Screen button, the image of your entire screen will be copied to clipboard.
- Press Print Screen > Paste it in MS Word, Pain or Photoshop > You will get the image of whole screen there.
- Press Alt+Print Screen > Paste it into another program > You will just get the image of your active window.
- Press Windows Logo Key + Print Screen > Your screen will blink for a second > You will get the image of your entire screen in your picture folder.
Subscribe to:
Posts (Atom)

